Tuesday, 29 October 2013

How and When to Use Sqlite

Sqlite is a very simple and fast open source SQL engine. This tutorial will explain when it is optimal to use Sqlite, as opposed to a full-blown RDBMS such as Mysql or Postgres, how to install it, and will also provide some basic usage examples, covering CRUD - Create, Read, Update, and Delete.

Clearing up a few misconceptions

Don't be deceived into thinking that Sqlite is only for testing and development. For example, it works fine for websites receiving up to 100 000 hits a day. And this is a conservative limit. The maximum size for a Sqlite database is 140 Terabytes (should be enough, right?), and it can be substantially faster than a full-blown RDBMS, as the full database and all other necessary data is stored in a normal file in the host's file system, so no separate server process is needed, cutting out all need for slow inter-process communication.

Optimal Usage of Sqlite

Sqlite is focused on simplicity. Because it is completely internal, it is often significantly faster than alternatives. If you are looking for portability (with regards to both languages and platforms), simplicity, speed, and a small memory footprint, then Sqlite is ideal. Its shortcoming are only apparent if you need high reading or writing concurrency: Sqlite can only support one writer at a time, and the normally high file system latency may be inconvenient if there is a need for many clients to access a Sqlite database simultaneously. A final possible disadvantage is that its syntax, though similar to other SQL systems, is unique, so while it's fairly trivial to move to another system, if you do 'outgrow' Sqlite, there will be some overhead involved in the transition. There are some very good outlines on the pros and cons of Sqlite here.

Installation

The sqlite3 module is part of the standard Python library, so on a standard Ubuntu installation, or any system with Python installed, no further installation is strictly necessary. To install the Sqlite command line interface on Ubuntu, use the commands:
sudo apt-get update
sudo apt-get install sqlite3 libsqlite3-dev
If you need to rather compile it from source, then grab the latest autoconf version from sqlite.org/download.html. At the time of writing:
wget http://sqlite.org/2013/sqlite-autoconf-3080100.tar.gz
tar xvfz sqlite-autoconf-3080100.tar.gz
cd sqlite-autoconf-3080100
./configure
make
make install
(Notes for building from source: 1) Don't do this on a standard Ubuntu installation, as you'll probably get a "header and source version mismatch" error, due to conflict between an already installed version and the newly installed one. 2) If the make command seems to expect further input, just be patient, as the source can take a while to compile.)

Basic Command Line Interface Usage

To create a database, run the command:
sqlite3 database.db
Where 'database' is the name of your database. If the file database.db already exists, Sqlite will open a connection to it; if it does not exist, it will be created. You should see output similar to:
SQLite version 3.8.1 2013-10-17 12:57:35
Enter ".help" for instructions
Enter SQL statements terminated with a ";"
sqlite>
Now let's create a table, and insert some data. This table, named "wines" has four columns - for an ID, the wine's producer, the wine's kind, and country of the wine's origin. As it's not Friday yet, we'll insert only three wines into our database:
CREATE TABLE wines (id integer, producer varchar(30), kind varchar(20), country varchar(20)); 
INSERT INTO WINES VALUES (1, "Rooiberg", "Pinotage", "South Africa");
INSERT INTO WINES VALUES (2, "KWV", "Shiraz", "South Africa");
INSERT INTO WINES VALUES (3, "Marks & Spencer", "Pinot Noir", "France");
We've created the database, a table, and some entries. Now press Ctrl + D to exit Sqlite, and type the following (again substituting your database's name for 'database'), which will reconnect to the database we just created:
sqlite3 database.db
Now type:
SELECT * FROM wines;
And you should see the entries we've just made:
1|Rooiberg|Pinotage|South Africa
2|KWV|Shiraz|South Africa
3|Marks & Spencer|Pinot Noir|France
Great. That's it for creating and reading. Let's do an update and delete:
UPDATE wines SET country="South Africa" WHERE country="France";
Which will update the database so all wines which are listed as coming from France will instead be listed as coming from South Africa. Check the result with:
SELECT * FROM wines;
And you should see:
1|Rooiberg|Pinotage|South Africa
2|KWV|Shiraz|South Africa
3|Marks & Spencer|Pinot Noir|South Africa
Now all our wines come from South Africa. Let's drink the KWV in celebration, and delete it from our database:
DELETE FROM wines WHERE id=2;
SELECT * FROM wines;
And we should see one fewer wine listed in our cellar:
1|Rooiberg|Pinotage|South Africa
3|Marks & Spencer|Pinot Noir|South Africa
And that covers all of the basic database operations. Sqlite has wrappers and drivers in all the major languages, and can run on most systems. A list of many of them can be found here. Good luck, and have fun.

Monday, 28 October 2013

A basic web app using Flask and MongoDB

This tutorial will show you how to set up a very simple database web application using the micro-framework Flask. We'll be using the Python library pymongo, which is available on PyPI and installable through PIP, and the free sandbox database at Mongolab. We'll use git with bitbucket to deploy the code to the server.

I assume that you already have root access to an Ubuntu server. This example was tried on a newly created Ubuntu 12.10 64-bit "Droplet" on Digital Ocean.

Included are very basic instructions to install Apache2 and mod-wsgi, too, but the emphasis of this tutorial is simplicity instead of security, so if you want instructions on setting up Apache2, read a tutorial specifically about that as well.

Let's begin with installing a few things we'll need. I've listed them all on separate lines, as you may have some of them already, and some of them are not absolutely necessary.

sudo apt-get install apache2 libapache2-mod-wsgi
sudo apt-get install libpcre3-dev
sudo apt-get install python-pip
sudo apt-get install build-essential python-dev
sudo apt-get install git-core

Apache2 is the web server we'll be using to serve our app, and libapache2-mod-wsgi is the wsgi mod for Apache which will let us use Python as a backend for a webpage. We'll use pip, a python package manager, to install Flask, which will allow us to easily interface with wsgi, and pymongo, which we'll use to connect to a Mongo database.

Note that the libpcre3-dev install is not strictly necessary, but pip will complain that it was unable to install the Flask C extensions necessary for speedups if you do not have it. Similarly, the build-essential and python-dev installs are not necessary, but are required for the C extension speedups for pymongo.

Now the python libraries we need

sudo pip install flask
sudo pip install pymongo

Make sure that you have pip, Flask, Pymongo, and git installed on your local machine as well. If you're using Ubuntu, follow the same steps above. I created this demo using Windows 7 as a local machine, and the tools are all available for Windows as well.

Next, we want to create a Mongo database. This is most easily done through Mongolab, which offers a free option. Head to mongolab.com, and create an account.

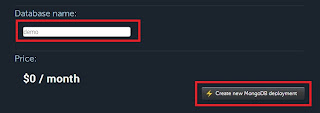
Create a new database, (for host options, the default AWS is probably the best option. Just select the location closest to your digitalocean server. As mine is in Amsterdam, I chose Ireland). Give it a name. Add a new user for the database and remember the username and password. Take note of the five pieces of information you need, given to you in the form of a url. See the screenshots below for a step-by-step guide on doing this.

Create a new database

Choose the free "development" server

Name your new database and press Create

Click on the database in the list to configure it

Click add a new user

Choose a database username and password.
(Note that this is different from your MongoLab username and password)

Make a note of the five bits of information we'll need in the python script.

Now create a new directory tree on your local machine with the following structure

demo
    \templates
    index.py
    index.wsgi

In index.py, type or copy the following, changing the database info in the connect() method as relevant.

from flask import Flask, render_template, request, redirect
import os
from pymongo import MongoClient

def connect():
# Substitute the 5 pieces of information you got when creating
# the Mongo DB Database (underlined in red in the screenshots)
# Obviously, do not store your password as plaintext in practice
    connection = MongoClient("ds053128.mongolab.com",53128)
    handle = connection["demo"]
    handle.authenticate("demo-user","12345678")
    return handle

app = Flask(__name__)
handle = connect()

# Bind our index page to both www.domain.com/ 
and www.domain.com/index
@app.route("/index" ,methods=['GET'])
@app.route("/", methods=['GET'])
def index():
    userinputs = [x for x in handle.mycollection.find()]
    return render_template('index.html', userinputs=userinputs)

@app.route("/write", methods=['POST'])
def write():
    userinput = request.form.get("userinput")
    oid = handle.mycollection.insert({"message":userinput})
    return redirect ("/")

@app.route("/deleteall", methods=['GET'])
def deleteall():
    handle.mycollection.remove()
    return redirect ("/")

# Remove the "debug=True" for production
if __name__ == '__main__':
    # Bind to PORT if defined, otherwise default to 5000.
    port = int(os.environ.get('PORT', 5000))

    app.run(host='0.0.0.0', port=port, debug=True)

Open index.wsgi and add:

import sys
sys.path.insert(0, '/var/www/demo')
from index import app as application


In the templates directory, create a new file called index.html. Add the following code: 

<html>
<head>
<title>Demo</title>
</head>
<body>
<h1>Hello</h1>
<form action="/write" method="POST">
<input type="text" name="userinput" id="userinput">
<input type="submit" value="Submit">
</form>
<a href="./deleteall">Delete all</a>

{% for userinput in userinputs %}
<p>'{{userinput.message}}' has database id {{userinput._id}}</p>
{% endfor %}
</body>

</html>

Try this out by running python index.py from the demo directory (or just index.py if you're in Windows.) Then open a web browser and navigate to http://locahost:5000

You should see a page like this:


The demo web app


You can submit text through the html form, and the results will appear below, displaying the Mongo Database _id associated with that entry.

Great - now head over to bitbucket.org and sign in or create an account. Press "Create" and create a new Git repo called demo. Now go to your demo directory in Terminal or Command Prompt and type (substituting your bitbucket username):

git init
git remote add origin https://sixhobbits@bitbucket.com/sixhobbits/demo.git
git add .
git commit -m "initial commit"
git push origin master
[enter your bitbucket password when prompted]

On your server, navigate to /var/www and type (again substituting your bitbucket name)

sudo git clone https://sixhobbits@bitbucket.com/sixhobbits/demo.git
[enter your bitbucket password when prompted]

And your code is ready. Now we just need to tell Apache where to find it. type
cd /etc/apache2/sites-available
ls

If you've just installed Apache you'll see a default file (and possibly a default-ssl one too). Type:

sudo a2dissite default

To disable the default site. Then type (substituting your domainname in place of flaskmongodemo.tk. You can get a .tk domain for free - just head over to dot.tk, find one that hasn't been taken yet, and point it to your digital ocean server's IP address).

sudo nano flaskmongodemo.tk

And paste the following code (I use vim for this step, but nano is installed by default on Ubuntu). Substitute your domain name in place of flaskmongodemo.tk.

<VirtualHost *:80>
    ServerName www.flaskmongodemo.tk
    ServerAlias flaskmongodemo.tk


    WSGIDaemonProcess www.flaskmongodemo.tk
    WSGIScriptAlias / /var/www/demo/index.wsgi


    <Directory /var/www/demo/index>
        WSGIProcessGroup index
        WSGIApplicationGroup %{GLOBAL}
        Order deny,allow
        Allow from all
    </Directory>

</VirtualHost>

Save your file (in Nano Ctrl + X and then Y when prompted) and type (again substituting your domain name)

sudo a2ensite flaskmongodemo.tk
sudo service apache2 reload

And it's done. You should be able to navigate to your url and see your app in action! Now that you can write to and read from a database, the possibilities are endless.

A useful command if things don't go as expected and you see an error instead of your app:

tail -f /var/log/apache2/error.log

This will show the error log of Apache, which is often helpful in tracing down cause of a problem.

The full app is currently at bitbucket.org/sixhobbits/demo.git, so you can simply clone it directly from there if you want.

Friday, 25 October 2013

Use all the keys on your keyboard - AHK

How often do you actually use the CAPSLOCK key? What about the "other" Alt and Control keys on the right-hand side of your keyboard? Or the AppsKey? Or the the much-hated "Windows" key? What about the left-right-up-down functions of your number pad when numlock is turned off?

Imagine if they could all easily be modified to do something useful.

Enter AutoHotkey (AHK), a free and very simple scripting language, which is designed to help you use your keyboard more efficiently. It can do anything from a simple remapping (make the 'a' key send a 'b' command, the 'b' key send a 'c' command, and annoy your friends and enemies), to creating full-blown GUI Applications.

Today, I'll be describing how you can use AHK for some simple window manipulation. Overusing a mouse or a touchpad leads to RSI (Repetitive Stress Injury), and also each time your fingers leave the keyboard you're wasting valuable time. Time you could be using in order to stop wasting time...

I'm assuming that you already know about the Windows shortcuts such as:
Alt + Tab switches between open applications
Win + Tab switches between open applications with a wheel-like graphic
Alt + F4 closes active window
Win + d shows the desktop

AutoHotkey is fairly straightforward to install. Head to the home page, press the download button, and run the .exe file. Once you've installed it, you should be able to right click on your desktop, select "New" and choose AutoHotkey Script from the menu. Name the file something like "hot keys", right click on it, and press "edit" to open it in notepad (Or press edit in Notepad++ if you have that installed).

So, let's start out by making use of one of the easiest to reach keys on a standard keyboard: The CapsLock key. We're not going to rob it of its primary function, so if you enjoy SHOUTING AT PEOPLE on forums, or you're a post-modernist writer who uses lots of block capitals to 'express yourself', fear not.

I often switch through a bunch of open applications, closing ones I don't need anymore. Normally this requires a bunch of Alt + Tabs interspersed by Alt + F4s, which is awkward as your middle finger keeps switching between the distant Tab and F4 keys, and your cramped thumb starts complaining that this wasn't what it went through all that evolution for.

Adding the lines below to your newly created AHK script will save you time and pain.

CapsLock & r::AltTab
CapsLock & e::ShiftAltTab
CapsLock & Space::WinClose,A

This means that holding down the CapsLock key and pressing 'r' will switch between your open applications. CapsLock and 'e' will do the same, but in reverse order. And most useful of all, pressing CapsLock and Space will close the active window. Now you never have to reach for that F4 key again. Just make sure that you release and repress the CapsLock key in between switching between applications and pressing the space bar, otherwise you'll end up quitting the Alt-Tab menu itself, and you won't be able to use Alt-Tab or Capslock + 'r' anymore (if you do do this by accident, the easiest way to restart the functionality is by logging out of windows and then back in again).

That was fun. But let's get a bit more inventive, and add some basic arithmetic. Windows 7 does a pretty neat job of snapping an application to exactly half the screen when you drag a window the the left or right, but it's a bit restrictive and it requires using the mouse, which we're trying to avoid. The few lines below will do a bit of arithmetic based on the size of your screen and snap the active window to the right or the left when you press Capslock and 'f' (right) or Capslock and 'd' (left). Note the "-40", which is to account for the 40 pixels that the taskbar needs. This works on a 15.6" laptop monitor with a standard sized Windows 7 taskbar. If you have your taskbar set to use small icons, or have a different sized monitor you'll need to play around with this number a bit to get it right. If your taskbar is set to auto-hide, you can remove it completely.

CapsLock & f::
{
WinRestore,A
WinMove,A,,A_ScreenWidth/2,0,A_ScreenWidth/2,A_ScreenHeight-40
return
}

CapsLock & d::
{
WinRestore,A
WinMove,A,,0,0,A_ScreenWidth/2,A_ScreenHeight-40
return
}

Now let's take that idea a bit further: the following lines will let you use CapsLock + 1, CapsLock + 2, CapsLock + 3, and CapsLock + 4 to make the active window take up exactly one quarter of the screen.

CapsLock & 1::
{
WinRestore,A
WinMove,A,,0,0,A_ScreenWidth/2,A_ScreenHeight/2
return
}
CapsLock & 2::
{
WinRestore,A
WinMove,A,,A_ScreenWidth/2,0,A_ScreenWidth/2,A_ScreenHeight/2
return
}
CapsLock & 3::
{
WinRestore,A
WinMove,A,,0,A_ScreenHeight/2,A_ScreenWidth/2,A_ScreenHeight/2-29
return
}
CapsLock & 4::
{
WinRestore,A
WinMove,A,,A_ScreenWidth/2,A_ScreenHeight/2,A_ScreenWidth/2,A_ScreenHeight/2-29
return
}

Now you can use use GMail, Facebook and VLC Media player, while doing some work in Microsoft Word. Isn't that productivity. And better still, try this. Put VLC in full-screen mode (open a movie and press F11), then press CapsLock + '2'. VLC will snap to the top right corner of screen, but remain in full-screen mode, so you won't have to sacrifice screen space to menu bars and borders. If you don't know what VLC is, it's the best media player out there, and it doesn't constantly complain about not being able to play your music and video files because they're in the wrong format: it plays anything*.


I can watch Top Gear and write at the same time...

Let's just add two more lines to our script:

CapsLock & m::WinMinimize,A
CapsLock & g::WinMaximize,A

So now we can maximize and minimize windows without the mouse as well. Just press CapsLock + 'm' to minimize the active window, and Capslock + 'g' to make the current window full size. And that's the end of window manipulation for now, but the possibilities of AHK are endless. My current main AHK script is over a thousand lines long. Check back soon for some hints on how to make typing more efficient, also using AHK.

If installing AHK is too much mission, here is a link to an .exe containing all the shortcuts mentioned in this post, which should run on any Windows PC without any installation. If you do get around to installing AHK, here is the script in an .ahk file, so you can download it and edit it to suit your needs.


* Well, maybe not everything. But why would we want to get technical in a blog with this one's title?

Wednesday, 23 October 2013

Favicons, Widgets and QR Codes

Let's assume that you've built yourself a website (as I described here) and have added Google Analytics tracking code (see my post on this here). You have a good-looking, functioning, free website, and you know if it's actually being used or not. This post describes how you might like to add some final icing using a favicon, a Twitter or Google Maps widget, and a vCard QR Code. If you already know what all three of these things are, then scroll down a bit to find out how to add them to your site. If you'd like to find out exactly what they are, then keep reading.

Favicons are the small icons that appear on web browser tabs and when people bookmark your page. You can see examples of the BBC News favicon below. Having a good favicon is essential to help people quickly find your webpage if they have it open along with a bunch of other tabs, or to easily locate it in their bookmarks bar.

Follow the red arrows...
A widget is like a window into another web page, embedded within your own webpage. This allows you to easily give people access to information from other places without running the risk that they'll get distracted navigating away from your page and then not bother returning. Below are examples of  a Google Maps widget and a Twitter widget from one of the first websites I built. The Google Maps widget allows users to zoom in and out and navigate around, without leaving your website. The Twitter widget is a great way of easily updating your page with new information from anywhere in the world: your latest tweets will automatically appear, letting you inform people of new events, all with a few key presses from your phone or computer.

Google Maps widget

Twitter widget
Finally, a QR Code is a barcode which can contain a variety of information. They're usually used for website links, and almost all modern phones can scan them through their built-in camera and decode them. It's becoming more common to encode all your contact information into a QR Code to easily share it with people, and these are beginning to appear on business cards. Adding a QR Code containing all your contact info to your web page makes it easy for people who are browsing the page on their computer to save your details to their phone. If they're viewing their website from their phone already, they'll be able to download the image and decode it directly. If you scan a QR Code containing contact information your phone will probably ask if you want to create a new Contact, and save all the information in a single step.


A QR Code on the 'contact' page of a website

And on my phone all I do is open an app (in my case, QRDroid), and aim my phone's camera more or less at my laptop's screen:

My phone directly after scanning the code
So simple! And now I can make the call immediately without having to type the numbers into my phone one at a time. And even better, I'm encouraged to save the contact to my phone, meaning I'm more likely to do repeat business. If I had to type the number into my phone, I'd probably end up losing it a short while later once my call log had got too long to locate it.

So, that's that for explanations. Now I hope you'll be surprised when you find out how easy it is to actually add all these things to your own site!

Favicons

To create your own favicon, head to http://favicon.cc and get creative with the 16x16 pixels which you have to play around with. If you already have a logo, you can import it and edit it from there, though unless your logo is very simple the imported result may be unusable once it's been reduced to 256 pixels. Once you're happy with the result, download it and save it at the root of your website (for a normal website this is the same place as your index.html file). You don't need to add anything to your website's code at all! As long as it's in the correct place and is called favicon.ico then all modern browsers will automatically find it.

Widgets

You can ask sites like Google and Twitter to give you html code for the widget you want. For Google Maps, press the link icon (red circle below), click "customize and preview embedded map", and copy the HTML code to where-ever you want the map to appear on your own website. 
Step 1


For Twitter, the process is very similar. Sign in to your Twitter account, press the cog at the top right corner of the page, and go to Settings. Select "Widgets" from the menu on the left and press "Create New". You can customize some colours and the size again, and you'll be given the code to paste into your site. The nice thing about Twitter widgets is you can choose to make a widget of any public feed; not only your own. You can also have more than one Twitter widget.

QR Codes

Go to http://goqr.me/. The default option is to create a text QR Code, but you'll see options for Text, URL, Call, SMS, or vCard. Select vCard and enter your contact information. You can watch the code dynamically grow as you fill in more fields. You can then either download the image file and use that directly in your website, or GoQR can even generate HTML, exactly like the Google and Twitter widgets described above, for you to embed directly. Personally I prefer to download the image, as the less your website relies on other services, the better, but either way will do.

And your website can now probably be regarded as complete. Remember, the favicon, the widgets, and the QR Code are all free optional extras if you order our site through Websited.


Monday, 21 October 2013

Stalker tendencies? It's OK - they're more acceptable online

This post explains the what, why, and how of adding Google Analytics to your website, and supplements my post from a couple of days ago (here), on creating your own site for free. It is followed by a post on Favicons, Widgets, and QR Codes (here).

Google Analytics watches your site's viewers. It can seem a bit creepy at times: not only will it tell you how many page views your site is getting, along with some nice graphs and charts to help you see whether interest is growing or waning, but it'll tell you a bunch of other information too. What web browsers (Chrome, Firefox, Internet Explorer, etc) your viewers are using, what their operating system is, what language they speak. What country they're from. What city they're from. If you install the Henry Higgins 3.0 BETA plugin, it'll place viewers within two streets.*

Furthermore, it'll tell you how long people spend on your site, how long they spend on each page, which pages they visited, which site they entered your site from. And more. In fact it inexplicably brings to mind the saying that a jealous woman with Google is far more effective and dangerous than any FBI agent.


An example of what the main Analytics page looks like. Screenshot stolen from kaushick.net

So whatever the size or popularity of your site, you'll probably find it useful to know how many people are actually looking at it, and how they're discovering it. (One example is if you post a link of your site in a Facebook or Twitter update, you can see how many of your followers actually bothered to click the link). Google Analytics provides excellent support for tracking more than one site as well, and it's very easy to set up. A simple matter of pasting some javascript, which Google provides, into the source code of your website.

As to actually setting it up, I'm not going to go into detail. All the instructions are on the Google Analytics site. Just head over to http://google.com/analytics to get started. (You do need to have a Google Account, which you already have if you use Gmail, YouTube, Picasa, or any other Google services).

The actual code you will get given looks something like this


<script type="text/javascript">

  var _gaq = _gaq || [];
  _gaq.push(['_setAccount', 'UA-0000000-1']);
  _gaq.push(['_trackPageview']);

  (function() {
    var ga = document.createElement('script'); ga.type = 'text/javascript'; ga.async = true;
    ga.src = ('https:' == document.location.protocol ? 'https://ssl' : 'http://www') + '.google-analytics.com/ga.js';
    var s = document.getElementsByTagName('script')[0]; s.parentNode.insertBefore(ga, s);
  })();

</script>


And you simply paste the whole chunk into your HTML source file (on every page if you want to track them all). It's recommended that you put it at the bottom of the <header> section.

So that's Google Analytics. Happy stalking! If you order your website through Websited, I'll implement Google Analytics for you as a free optional extra! 


* OK, the part about the street is a joke. If you don't understand the reference, do yourself a favour and read the best play ever written (here). The rest is true.

Saturday, 19 October 2013

Beautiful code

Non-coders often look at me slightly suspiciously when I tell them that writing code is creative in much the same way that art, music, English, and philosophy are creative. Today I applied for an internship. One of the questions on the application form asked you to find the sum of integers, where integers which were multiples of three or five were to be summed twice. A very obvious approach to the problem would be (all examples written in Python):

s = 0
for i in range(0,1001):
if i % 3 == 0 or i % 5 == 0:
s += i
s += i
print s

Which simply loops through all the numbers and keeps track of the total. If the number divided by three or five gives a remainder of zero, then that particular number is added twice.

Another option, one line shorter but a bit less clear:

r = range(0,1001)
for i,v in enumerate(r):
if v % 3 == 0 or v % 5 == 0:
r[i] = 2 * v
print sum(r)

This loops through the list of numbers, keeping track of the index and the value. If any number is a multiple of three or five, it multiplies it by two in place. Finally, it sums the list. (No, I'm not suggesting that you code like this.)

If you want to do it in a single line of code, it's not that difficult:

print sum([2 * x if (x % 3 == 0 or x % 5 == 0) else x for x in range(1,1001)])

Using a neat Python list comprehension, we can look at each number, and add either that number or two times that number, depending on whether it is a multiple of three or five, to a new list, and then sum that. It seemed elegant and efficient enough, and it's what I handed in as my solution.

But then afterwards I realised an arguably better way to do it (though it doesn't use list comprehensions, so I'm petulantly going to argue that it's not necessarily better, solely on the basis that I like list comprehensions)

print sum(set(range(3,1001,3) + range(5,1001,5))) + sum(range(1,1001))

That uses fewer characters, is much more efficient and is more beautiful. It creates two different lists, one of all the multiples of threes, one of fives, and sums the set of the union of these two lists, and then adds the sum of all the numbers in the original range. No if statements, no loops, and no mods. 

Now at least if I don't get the internship I can convince myself that I would have got it if I'd only taken those extra couple of minutes before pressing the submit button.

The best way to have a beautiful and free website

There are a number of ways to have your own little piece of the Internet, even if you're unwilling to give up any hard-earned cash. I've tried many of them, including Blogger, Google Sites, Wordpress, Wix, and Weebly. Some keep bothering you to buy "extras", which you actually need; some just don't look good; some display banners, watermarks, or their own ads; for whatever reason, I found all of them less than completely satisfactory. "Drag and drop" website builders generally produce websites which look like they've been dragged through some mud and dropped off a cliff.

But this does not mean that you have to install your own Apache server and build a website from scratch.

Here's how to build a simple, sleek, and absolutely free website, with no ads, a good-looking domain, and nothing needed but a working knowledge of HTML. Sounds good? Let's go.

We'll be using three different sites, one each for the site itself, the hosting, and the domain. So let's break it down into three steps

Step 1
Head over to html5up.net, choose any one of the beautiful templates and download the .zip of it. Edit index.html and other .html pages you need to suit your needs. Rezip the file. Yes, this step is fairly involved considering the instructions are two lines, but if you've ever used HTML before, it shouldn't be that difficult to work out what to delete and what to edit from the source of the template files.

Step 2
Go to dot.tk, create an account, and register a free domain (e.g. yourname.tk). Don't forward it anywhere for now, as you'll only get the details in the next step.

Step 3
Now visit 000webhost.com. In spite of their unconventional name, they provide an unbelievable free package (at the time of writing, 1.5 GB space for website, plus 100 GB/month bandwidth). Register an account, and place an order for free web hosting, using the domain name you registered in Step 2 (hint: you don't have to like their Facebook page to do this, though they make it seem like you do as part of the sign-up process). Now go back to the dot.tk control panel and point the domain to the IP address which 000webhost gave you. Then head to 000freehost web uploader and upload the .zip file of your website from Step 1 (I had issues using their Java uploader, and connecting through FTP using FileZilla, but these are supposedly also options).

(Or, if you decide to go for a paid option at 000webhost, why not use my referral link: http://www.000webhost.com/736578.html, and they'll give me something in return.)

TaDa! You have a website. A website which is completely free, over which you have full control. Wasn't that fun and simple.

If all this seems like too much effort, take a look at Websited, where I offer to organize it all for you (including all the template editing) for a nominal fee.

You can read about what Google Analytics can do for you and how to add it to your site in my later post, here.

Friday, 18 October 2013

Moving back to Windows

After using Windows since I was 2 years old, I changed to Ubuntu at the end of 2012. The last several months made me think I'd never go back to Windows: on Linux, everything just worked. It had taken me hours to get Pip (the Python package manager), Git, and PuTTY to half-work on Windows in December, when I needed them for an internship I was doing with Cable Kiosk, and even after I'd read thousands of forum posts and discovered the source of all the issues I had, I was left with an unsatisfactory experience. After I decided to move to Ubuntu, all these tools needed a simple sudo apt-get install and then gave no further trouble. Seconds later and I was using the tool for what I needed to achieve, instead of looking for more tools to make the first tools work. Except for PuTTY, which was even simpler: it was unnecessary as Ubuntu came with a SSH client by default. Hours of work had been made completely unnecessary. 

Then a few days ago I discovered XMonad, and I became even more pleased with Ubuntu. Window management was the one thing which had continued to irk me, and this solved almost all the problems I'd had. It actually felt like a much better version of something I'd hacked together for Windows years previously using AHK - with a few keystrokes, I could have the window I wanted, the size I wanted it, aligned with other windows as I wanted.

The one problem I continued to have was a compatibility issue between my Atheros wireless chip and Ubuntu. My internet connection worked very seldom, and when I got it to connect at all to any wireless network speeds were ridiculously slow. I'd read a million billion forum posts, and found a few people with the same issue. I thought I'd found a fix, but it was a temporary fix, and for some reason no longer works. I've been living with this problem by connecting to wireless networks using my phone, and tethering that to my laptop, which mostly works, but is always an annoyance.

Today, several files I'd been using yesterday (two .PDFs and two .docs, my seminar worksheets and readings for today) wouldn't open. I'd been reading them using LibreOffice and Document Viewer yesterday, and had written answers to some of the seminar questions. Today they refused to open under any application, Linux or Windows.

I booted into Windows to connect directly to the network and download the files again. As Microsoft Word is, for all its faults, still better than Libre Office, I decided to use Windows for today. My laptop battery, which I thought was growing weaker with age, pulled off an unprecedented act and lasted through a lecture and two seminars, with WiFi on, whereas I am used it barely making it through an hour lecture, with WiFi switched off.

So while there are things one can so easily achieve under Linux which take pain and effort under Windows, I have now found enough conveniences of Windows to tip the scales again. Maybe I'll try Linux as a primary OS again when I get a new laptop, but for now, it'll go back to sitting dormant until I specifically need it for something. Or until a "NextNextNextNextNextIAcceptNextNextNext" Windows Installer proves too much for my sanity.